Teachers, before we dive into learning all about the inductive method of teaching, let's do a quick exercise.
Imagine you're a teacher with a goal: “Teach your students about ecosystems.”
What would be your approach?
Option A: You “spoon-feed” all the facts about ecosystems directly. You explain why they're essential and provide examples to illustrate the concepts.
Option B: You lead your students on an outdoor adventure in a garden, encouraging them to be little Sherlocks (detectives). They observe insects and plants, piecing together how each element contributes to the ecosystem through their own discoveries.
If you're leaning towards Option B, you're tapping into the Inductive Method of Teaching.
In this blog, we'll thoroughly examine the inductive teaching method. We'll understand its meaning, examine how it can be applied to different subjects, and compare it with the deductive teaching method.
By the end, you'll have a solid grasp of how to apply this inductive approach in your classroom and engage your students. Let's get started.
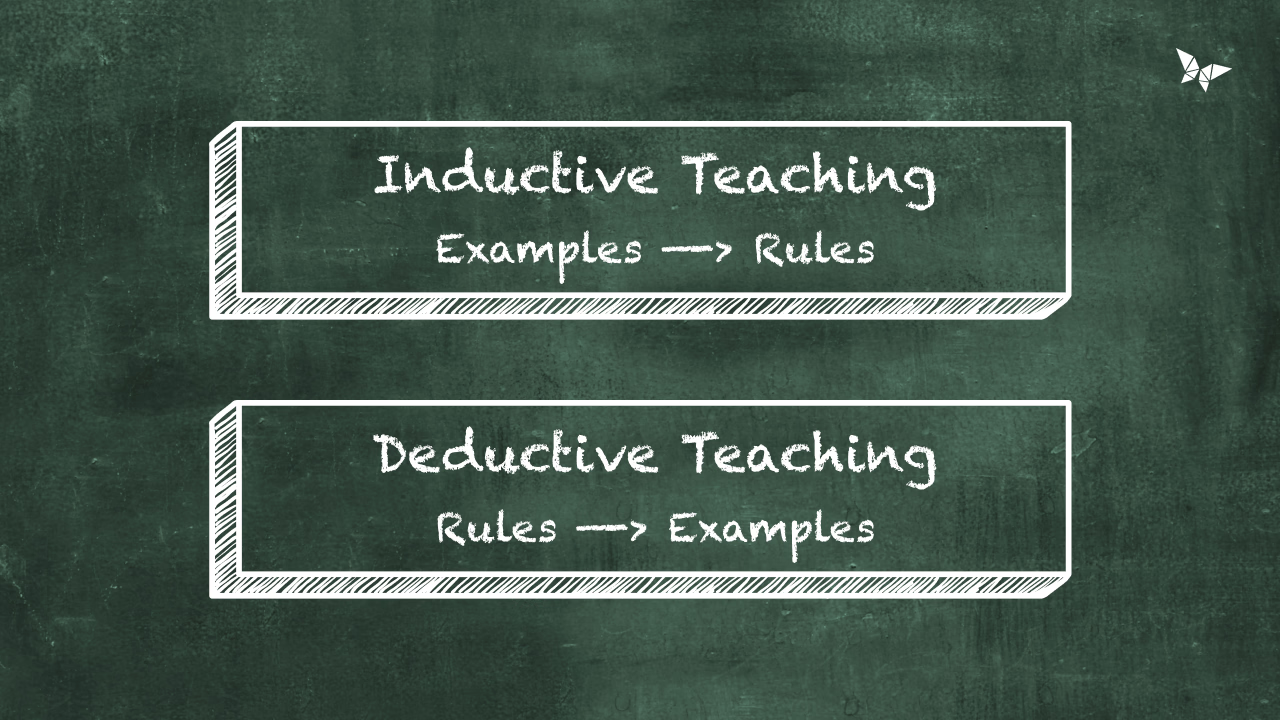
Think of the inductive method of teaching as flipping the coin on the usual classroom scene. Usually, you start with the theories or principles and then maybe show an example.
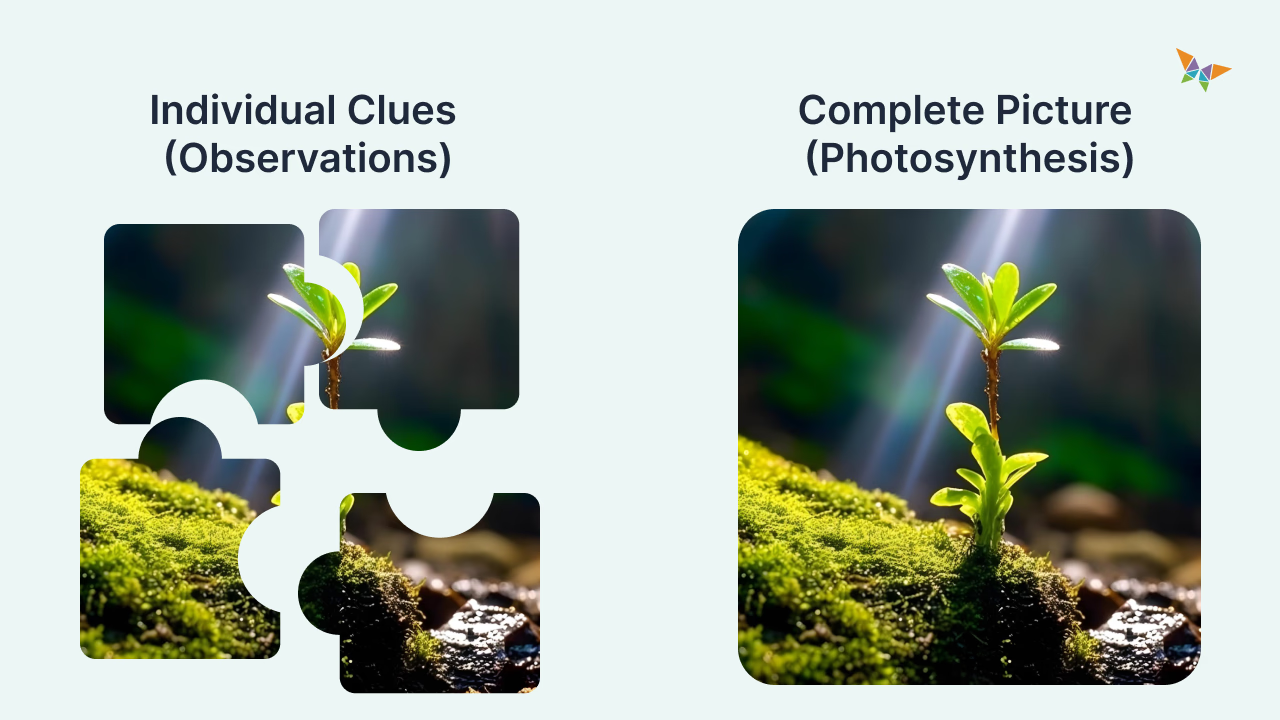
But when it comes to the inductive method, you start with examples, data, and observations. It's like putting together a puzzle: Students examine individual pieces (observations) and work their way toward seeing the whole picture (theories or principles).
It's hands-on, engaging, and puts students at the center of their learning journey.
In simpler terms, the inductive method of teaching lets students learn by doing. They observe, they question, and through these experiences, they uncover the big ideas on their own. It’s all about discovery.
Learning is not the product of teaching. Learning is the product of the activity of learners.
This quote by John Holt, an author and educator, perfectly captures the spirit of the inductive method. It highlights the shift from teaching to facilitating, where learning becomes a journey of exploration for students.
Through this method, students learn to connect the dots, crafting a more profound understanding that goes beyond memorization.
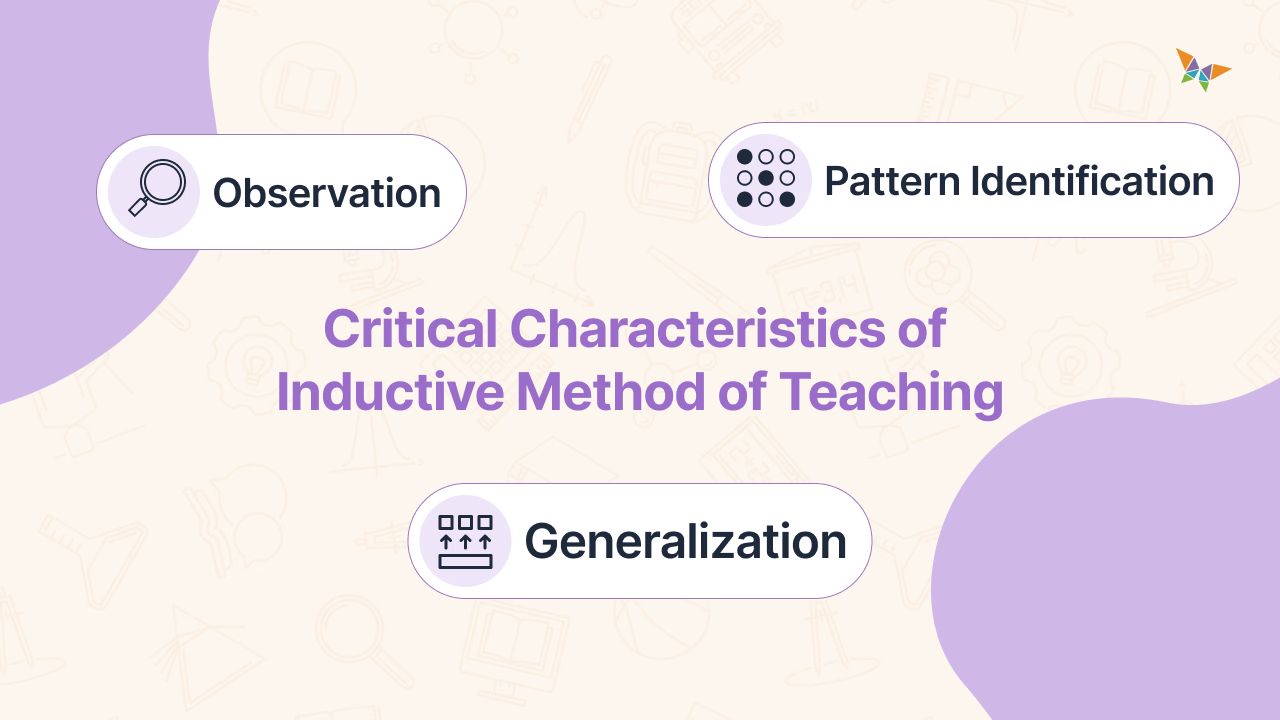
Let’s understand what we’ve discussed till now about the inductive method of teaching in terms of the three critical characteristics of this approach:
- Observation: It starts with something tangible — students explore real-life instances or data first-hand. Imagine them observing plant growth in different soils. It's learning by seeing and touching, not just hearing.
- Pattern Identification: Next, they're like puzzle solvers, spotting trends in their observations. From our above-used plant example, they might notice faster growth in a specific soil type. It's about connecting dots based on real evidence.
- Generalization: Finally, they draw broader conclusions from these specifics. For example, they might deduce that some soils are better for plant growth. This is the "aha" moment where personal discovery turns into broader understanding.
This process turns the classroom into a lab of sorts, where learning is driven by curiosity and investigation. Your students start making connections, understanding the 'why' behind the 'what', and truly own their learning process. This approach enriches their knowledge and equips them with critical thinking skills, preparing them for the world beyond the classroom.
Now we know that the inductive method shifts the focus to student-driven discovery. So, let's learn the steps you can take to make this approach effective in practice.
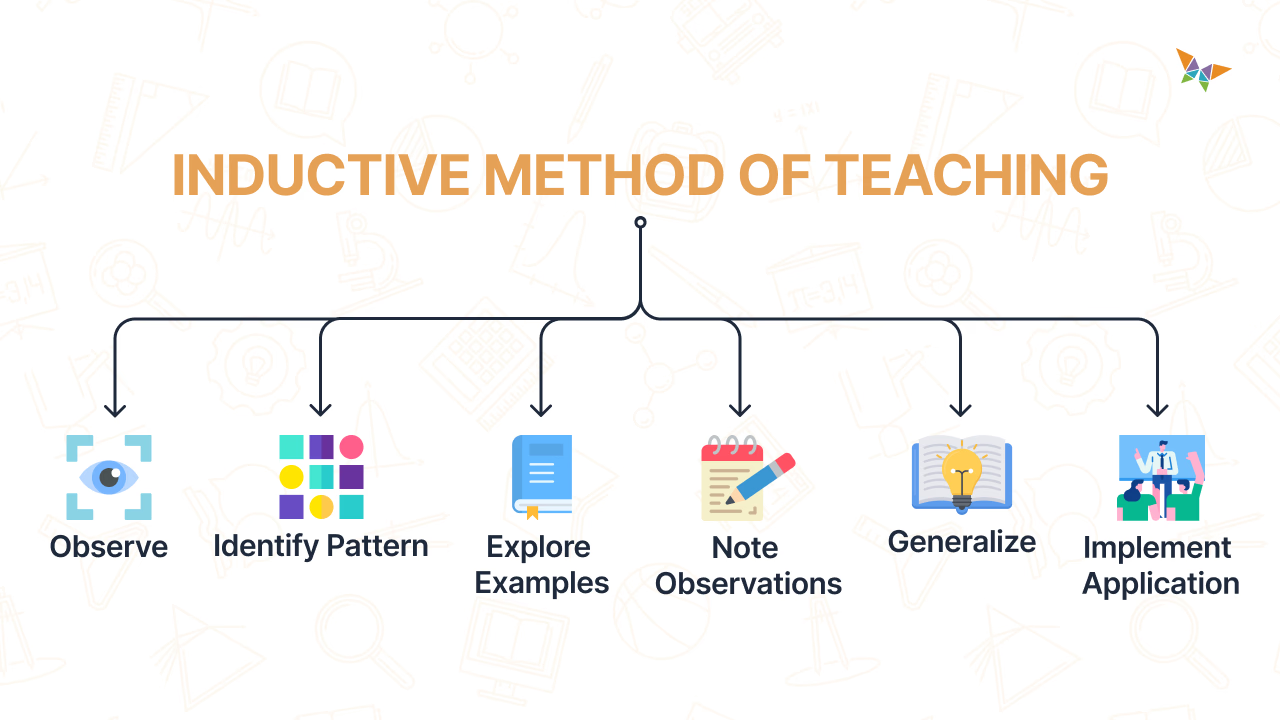
Implementing the inductive method effectively involves several key steps. Each step builds on the last, guiding students from initial curiosity to deep understanding. To effectively apply the inductive method, we'll break down each step with an example from a lesson on photosynthesis. Here’s how you can make it work:
Step 1: Kicking Off with Examples or Data
You set the stage with intriguing examples or quirky data related to the lesson you want to teach. This initial step sparks curiosity and sets the foundation for inquiry.
Example for a Photosynthesis lesson: Show students various plants placed in different lighting conditions—some in direct sunlight, others in shade. This visual contrast invites students to ponder the effects of light on plant growth.
Step 2: Observation - The Detective Work
Now, let your students don their detective hats. Encourage them to note down anything that jumps out at them - the weirder, the better. This is where they sharpen their eyes for detail, and who knows, maybe find their calling as the next Sherlock Holmes.
Example for a Photosynthesis lesson: Guide students to examine the plants' leaf color, size, and overall health. Have them record their observations, focusing on differences attributed to varying light exposures.
Step 3: Identifying Patterns - Connecting the Dots
This is the "Wait a minute…" moment. Students start connecting those dots, spotting patterns, kind of like finding out two songs have the same tune.
Example for a Photosynthesis lesson: Facilitate a class discussion where students share their observations. Guide them to identify patterns, such as plants in sunlight appearing healthier than those in shade.
Step 4: Formulating Hypotheses - The "What If" Game
Based on their detective work, students now play the "What if" game. They propose ideas or hypotheses about why those patterns they noticed exist. Think of it as piecing together a mystery from clues, using evidence they've gathered rather than making random guesses.
Example for a Photosynthesis lesson: Encourage students to theorize why sunlight seems to affect plant health. They might guess that sunlight is somehow crucial for the plant's food-making process.
Step 5: Testing and Verifying - The Reality Check
Have students test out their theories now. This could mean experiments, observations, or research (Google Scholar, anyone?). It's the moment of truth where they find out if their hypothesis is right or if they need to rethink.
Example for a Photosynthesis lesson: Conduct a simple classroom experiment. Place new plants in different lighting conditions and observe them over time. This real-life observation helps verify the students' hypotheses about sunlight and plant growth.
Step 6: Application - The Grand Finale
Finally, encourage them to apply what they've discovered to new scenarios. It's like learning how to ride a bike and then trying out different paths. This step checks if what they've learned can be used in other areas, not just in class.
Example for a Photosynthesis lesson: Challenge students to apply their understanding by designing a mini-garden, considering their learnings about sunlight and plant growth.
Following these steps does more than just fill your class time; it revolutionizes how students interact with the material and the world.
Instead of producing learners with identical sets of information—like robots off an assembly line—it cultivates individuals who think independently. This approach stretches their minds, encouraging them to explore and discover on their own.
They become not just learners but thinkers, innovators, and problem solvers.
They get prepared not just for tests but for life.
This transformation is echoed in the philosophy of Sandeep Hooda, Co-Founder of Vega Schools:
In our schools, teachers don't follow preset lesson plans. This liberates their creativity and innovation, inspiring students to mirror these qualities and become proactive, engaged learners.
Now, let's use a straightforward example to show how you can apply these inductive method steps in your classroom. This will clarify the process and show you how each step unfolds in real life.
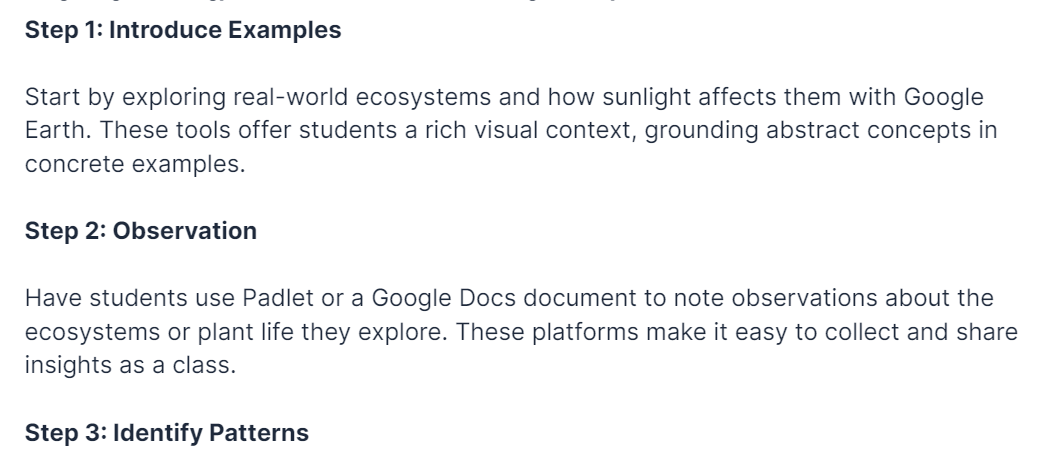
While you've seen the steps to the inductive approach, there's a simple trick to really take it to the next level: integrating technology.
For today's students, technology is almost like a second language. They're incredibly comfortable with it, navigating through apps and websites with ease. And you can build on that, especially in the context of inductive teaching.
Let’s examine how technology can specifically amplify each step of the inductive method, making lessons not just informative but truly captivating.
Integrating Technology with Inductive Method of Teaching: Photosynthesis Lesson
The inductive method of teaching can be a game-changer across all subjects, maximizing student engagement and deepening understanding. Let’s zero in on how this method can transform learning in three core areas: Mathematics, Science, and Language Arts.
Mathematics with the Inductive Method of Teaching
In math, this approach transforms every equation into an intriguing puzzle, making patterns and numbers the clues for discovery.
Benefits of using the Inductive Method in Mathematics
- Enhances Pattern Recognition: Helps students identify and understand patterns in numbers, shapes, and equations.
- Promotes Critical Thinking: Encourages students to think critically and logically as they formulate and test hypotheses.
- Fosters Active Learning: Engages students actively in the learning process, making mathematics more interactive and exciting.
- Builds Problem-Solving Skills: Develops students' ability to solve problems by applying learned concepts to new situations.
Applying the Inductive Method of Teaching: Number Sequences Lesson
Step 1: Kicking Off with Examples or Data
Start the lesson by writing a series of number sequences on the board, such as 2, 4, 6, 8, 10 and 5, 10, 15, 20. Ask the students to look at the sequences and think about what they notice.
Step 2: Observation
Have students write down their observations about the sequences. For example, they might note that the numbers increase consistently in each sequence.
Step 3: Identifying Patterns
Lead a class discussion in which students share their observations. Help them recognize the pattern that in the first sequence, each number increases by 2, and in the second sequence, each number increases by 5.
Step 4: Formulating Hypotheses
Encourage students to come up with explanations for why the numbers increase the way they do. They might suggest that there is a rule or formula that determines the following number in the sequence.
Step 5: Testing and Verifying
Introduce a new sequence, such as 3, 6, 9, 12, and ask the students to apply their hypothesis to predict the following number. This step allows them to test and verify their understanding of the pattern.
Step 6: Application
Challenge students to create their own number sequences using the rules they created. They can then share these sequences with classmates to see if others can identify the pattern and continue the sequence.
Science with the Inductive Method of Teaching
In science, the inductive method is about getting hands-on and making discoveries that stick. Here's why this approach can light up the science class:
Benefits of using the Inductive Method in Science
- Drives Inquiry-Based Learning: It turns students into little scientists, always asking questions and seeking answers.
- Leads to Experimental Learning: Your students don't just learn science; they do science, through experiments that make abstract concepts real.
- Deepens Concept Understanding: Complex ideas become clearer when students connect them with their own observations and experiences.
- Sharpens Analytical Skills: Students learn to analyze data, identify patterns, and connect the dots between different scientific ideas.
Applying the Inductive Method of Teaching: States of Matter Lesson
Step 1: Kicking Off with Examples or Data
Begin by showing students a variety of substances in different states: a solid (ice), a liquid (water), and a gas (steam). Ask them to describe what they see and how each state is different.
Step 2: Observation
Encourage students to observe the properties of each state. Have them note characteristics such as shape and volume and how the substances respond to being poured or held.
Step 3: Identifying Patterns
Facilitate a class discussion where students share their observations. Guide them to identify patterns—solids having a fixed shape, liquids taking the shape of their container, and gasses filling the entire space available.
Step 4: Formulating Hypotheses
Encourage students to develop theories about why substances exist in different states. They might guess that it has something to do with temperature.
Step 5: Testing and Verifying
Conduct a simple experiment to demonstrate the effect of temperature on states of matter. For example, heat ice to turn it into water and steam, then cool it back down. This will help verify the students' hypotheses about temperature's role in changing states of matter.
Step 6: Application
Challenge students to apply their understanding by predicting what might happen to other substances when heated or cooled. They can also discuss the practical applications of states of matter in everyday life, such as in refrigeration.
Language Arts with the Inductive Method of Teaching
When you bring the inductive method into Language Arts, you're not just teaching students to read and write. You're inviting them into the world of words, showing them how to unravel texts and create their own language. Here's why this approach breathes life into literary lessons:
Benefits of using the Inductive Method in Language Arts
- Boosts Reading Comprehension: Helps students understand and interpret texts by identifying literary devices and structural elements.
- Sharpens Critical Thinking: Students dive deeper, questioning why authors choose certain words or phrases.
- Ignites Creativity: Students get to play with language, trying out their own literary experiments.
- Builds Textual Analysis: It's about teaching your students to fish rather than giving them the fish, developing skills they'll use across all subjects.
Applying the Inductive Method of Teaching: Exploring Literary Devices
Step 1: Kicking Off with Examples or Data
Start by presenting students with excerpts from different literary works, each containing literary devices such as metaphors, similes, and alliteration. Ask them to read the excerpts carefully.
Step 2: Observation
Encourage students to highlight any phrases or sentences that stand out to them. Ask them to note any patterns or repetitions they observe in the language used.
Step 3: Identifying Patterns
Lead a class discussion where students share their observations. Guide them to identify patterns, such as the use of comparisons in metaphors and similes.
Step 4: Formulating Hypotheses
Encourage students to theorize why authors might use these literary devices. They might guess that they help create vivid imagery, evoke emotions, or add depth to the text.
Step 5: Testing and Verifying
Provide additional excerpts and ask students to identify the literary devices used. Discuss as a class how effectively these devices contribute to the overall meaning and impact of the text.
Step 6: Application
Challenge students to apply their understanding by writing their own short piece using at least three different literary devices.
The inductive method isn't just for math, science, or language arts. It works wonders across all subjects! Imagine using it in history, economics, or even art. It’s all about getting students to see, think, and discover for themselves.
Start with real examples, guide them to find patterns, and let them figure out the big ideas. This way, every lesson becomes an exciting journey of discovery, no matter the topic. So, go ahead, apply this method everywhere, and watch your classroom come alive with curiosity and understanding.
Now that we've seen the inductive method in action across subjects, let's discuss how to assess this kind of learning.
Now that you've got a handle on inductive teaching, it's crucial to discuss assessments. With inductive teaching, assessments go beyond traditional tests. They help you see not just whether students can recall information but also how they use it and engage with new problems.
Let's explore some strategies that can help you assess learning effectively post applying the inductive approach:
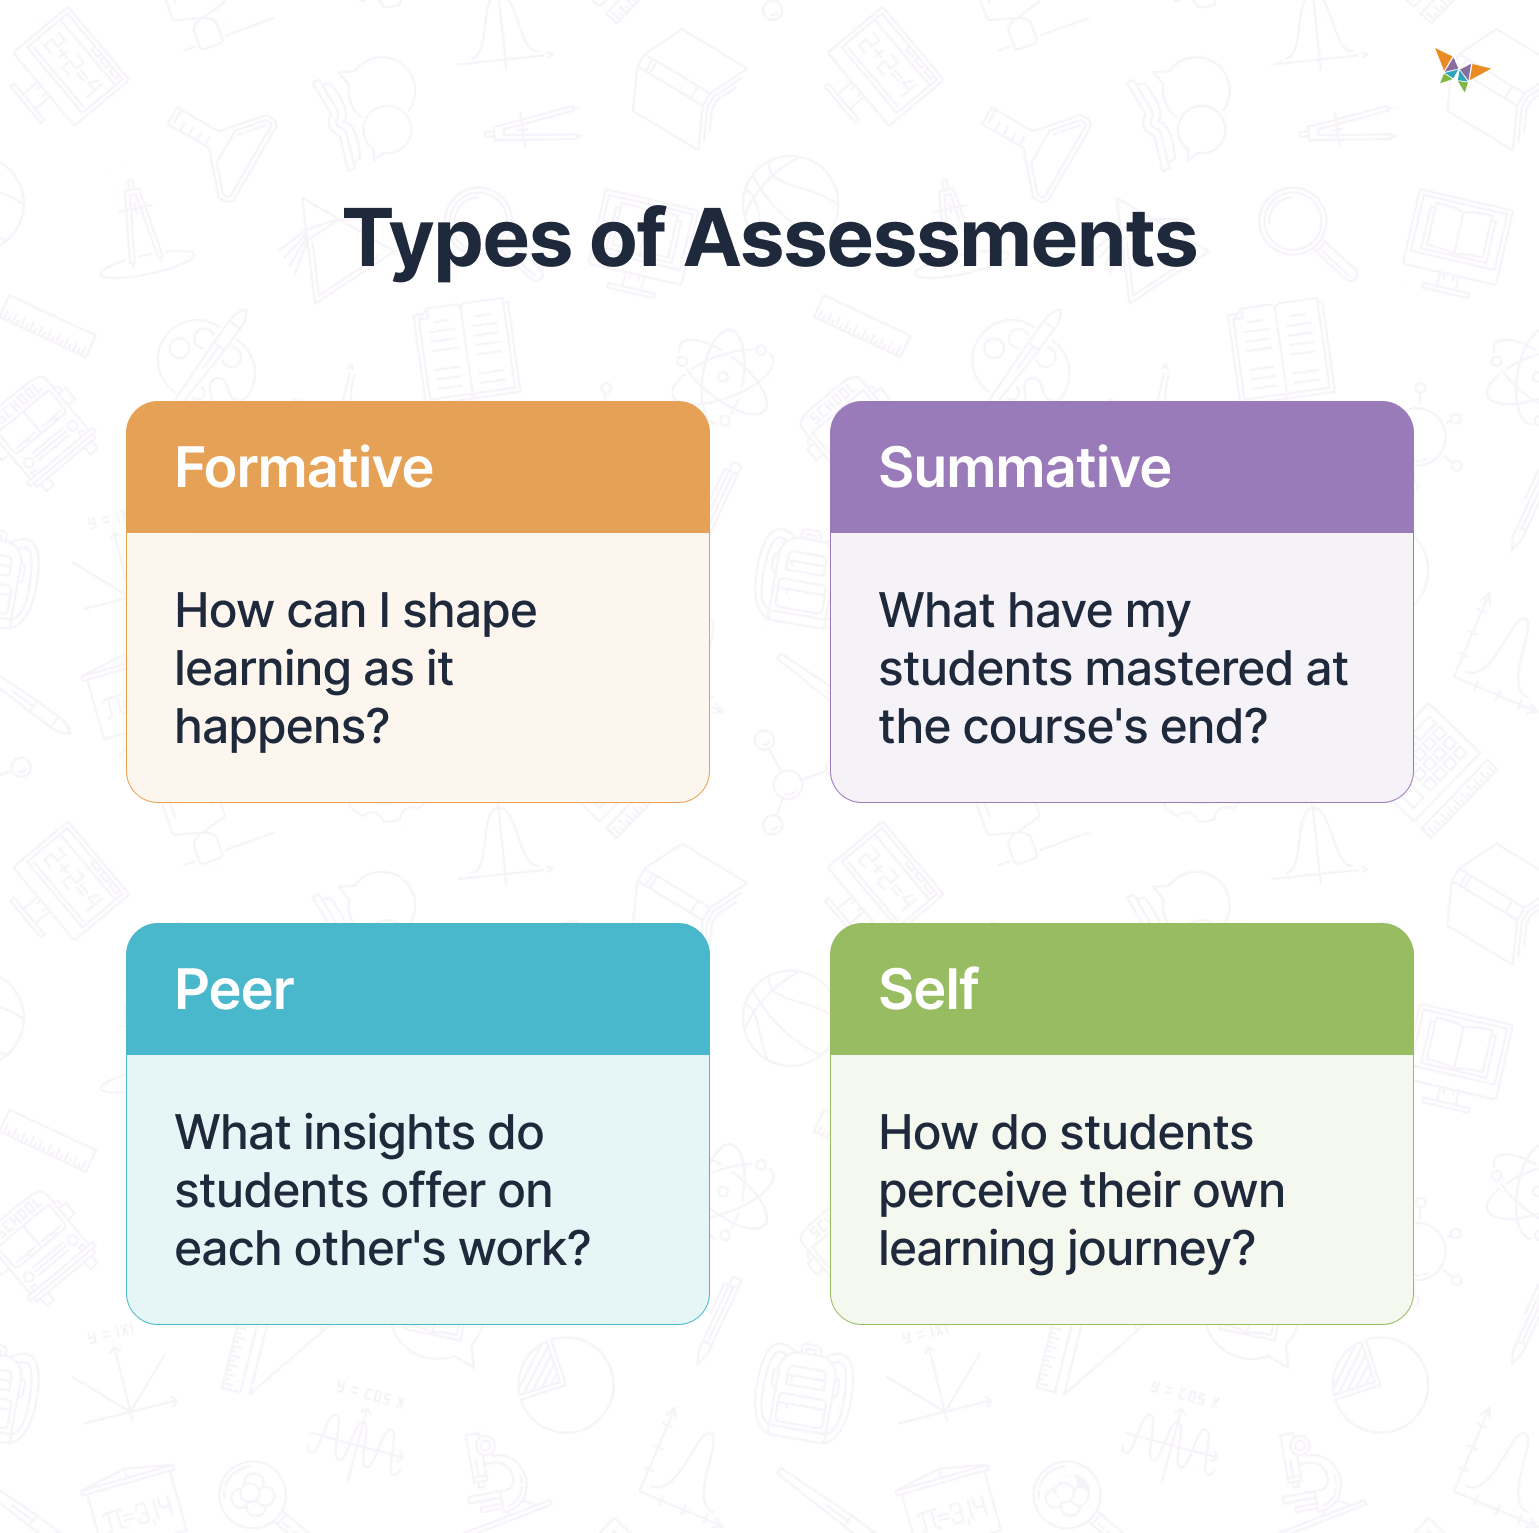
Formative Assessments
These act as real-time insights into student understanding. Use quick quizzes or discussions to check how well students are understanding the material as you go. This helps you see if you need to explain things differently or revisit concepts.
Summative Assessments
Instead of traditional tests, consider using comprehensive projects or portfolios. This way, you can see how students apply their knowledge to bigger tasks or real-life scenarios.
Peer Assessments
Have students give feedback on each other’s work. This will help them learn how to give helpful feedback and see different ways of approaching a problem.
But here's where it gets even better for you as a teacher: Peer assessments provide insight into how your students understand and process information. Observing their feedback to one another can reveal gaps in their knowledge or even strengths you hadn’t fully appreciated. It’s like having an extra set of eyes, helping you tailor your teaching strategies more effectively.
Self-Assessments
Encourage students to reflect on their own learning experiences. Questions like "What did you find challenging?" help them identify their strengths and areas for improvement.
These strategies give you a fuller picture of what students are really getting out of your lessons. It’s about more than right answers; it’s about thinking, understanding, and applying knowledge.
Now that we've covered assessment strategies, let's weigh the pros and cons of the inductive teaching method next.
The inductive method of teaching opens the door to a more vibrant, hands-on classroom. It’s all about letting students lead the way in their learning journey, which can be pretty exciting.
Yet every method has merits and demerits. So, let’s now understand more about inductive teaching’s strengths and challenges.
Merits of the Inductive Method
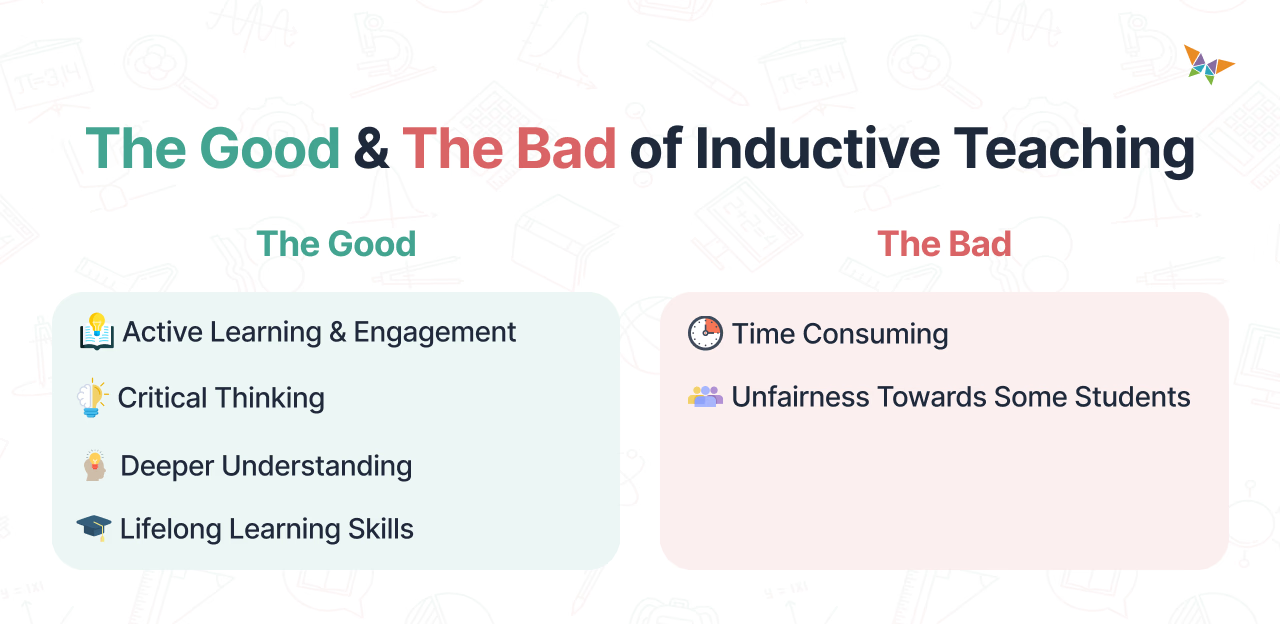
- Encourages Active Learning & Engagement: Students learn by doing, which boosts engagement and retention.
- Develops Critical Thinking: By analyzing data and forming theories, students enhance their problem-solving skills.
- Fosters Independence: This method empowers students to take charge of their learning, building confidence.
- Adaptable Across Subjects: Whether it's math, science, or language arts, inductive teaching is versatile.
- Promotes Deeper Understanding: Students build knowledge from the ground up, leading to a stronger grasp of concepts.
- Cultivates Lifelong Learning Skills: Encourages curiosity, research skills, and the ability to learn independently.
- Supports Differentiated Learning: This can be tailored to meet learners' diverse needs, respecting their unique pace and style.
Now let’s look at the demerits of the inductive method of teaching along with some strategies to tackle them.
Demerits of the Inductive Method and Strategic Solutions
1. Time-Consuming and Resource-Intensive: Planning and executing inductive lessons require more time and resources. You would need to arrange resources to aid students’ observation, and they’ll take time to observe and connect the dots.
💡 Solution: Gradually integrate inductive elements and leverage technology. Use micro teaching skills to refine and focus teaching strategies, efficiently using time and resources. Lean on shared resources, collaborate with colleagues, and use free online platforms whenever possible.
2. Variability in Student Engagement and Potential Overwhelm: Some students might struggle to take initiative, while others may feel overwhelmed by inductive learning's open-ended nature.
💡 Solution: Employ differentiated learning to cater to diverse student needs. Provide structured guidance and clear frameworks to increase independence gradually.
3. Assessment Challenges and Risk of Misconceptions: Traditional tests may not capture the depth of understanding, and students may draw incorrect conclusions without direct instruction.
💡 Solution: Incorporate project-based assessments and regular feedback sessions to address misconceptions and evaluate understanding effectively.
4. Requires High Levels of Teacher Flexibility: Adapting to where the students’ discoveries lead can be challenging.
💡 Solution: Plan for flexibility and be open to following the learning path wherever it leads. Use professional development opportunities to enhance adaptability.
5. Classroom Management Challenges: The active nature of inductive learning can lead to a noisy and bustling classroom environment.
💡 Solution: Establish clear norms and routines for group work and discussions, and use strategic seating arrangements to manage dynamics.
By embracing the inductive method with an open mind and a flexible approach, you can navigate its challenges and amplify its benefits.
Remember, your goal-
NOT TO follow the method rigidly
BUT TO adapt it in ways that ignite curiosity, foster understanding, and celebrate each student's unique learning journey.
Having delved into the inductive method's pros and cons, let's now compare it with the deductive method. We’ll see how these two teaching methods compare and when each might be the best fit for your classroom.
The deductive method is often seen as the opposite of the inductive method. While inductive teaching encourages students to draw generalizations from specific observations, deductive teaching takes the opposite route.
Let’s briefly explore deductive teaching before comparing the two approaches.
Meaning & Characteristics of Deductive Method of Teaching
Deductive teaching (analogous to the traditional teaching method) starts with the rule. It’s a top-down approach in which you present a general concept and follow it with specific examples. You give students the theory first and then show how it applies in various situations.
Key characteristics include:
- Teacher-Centered: You lead the lesson, providing the rules or principles.
- Rule-Based Learning: Students learn by applying the given rules to solve problems or understand concepts.
- Direct Instruction: The focus is on direct teaching, with less emphasis on student discovery.
- Structured Approach: Lessons are more structured and predictable, with a precise sequence from rule to application.
Let’s take a simple example to help you clearly understand the deductive method of teaching-
Imagine teaching a mathematics lesson on area. You explain a formula first, like the area of a rectangle. Then, students use it to calculate the areas of different rectangles. It’s direct and to the point.
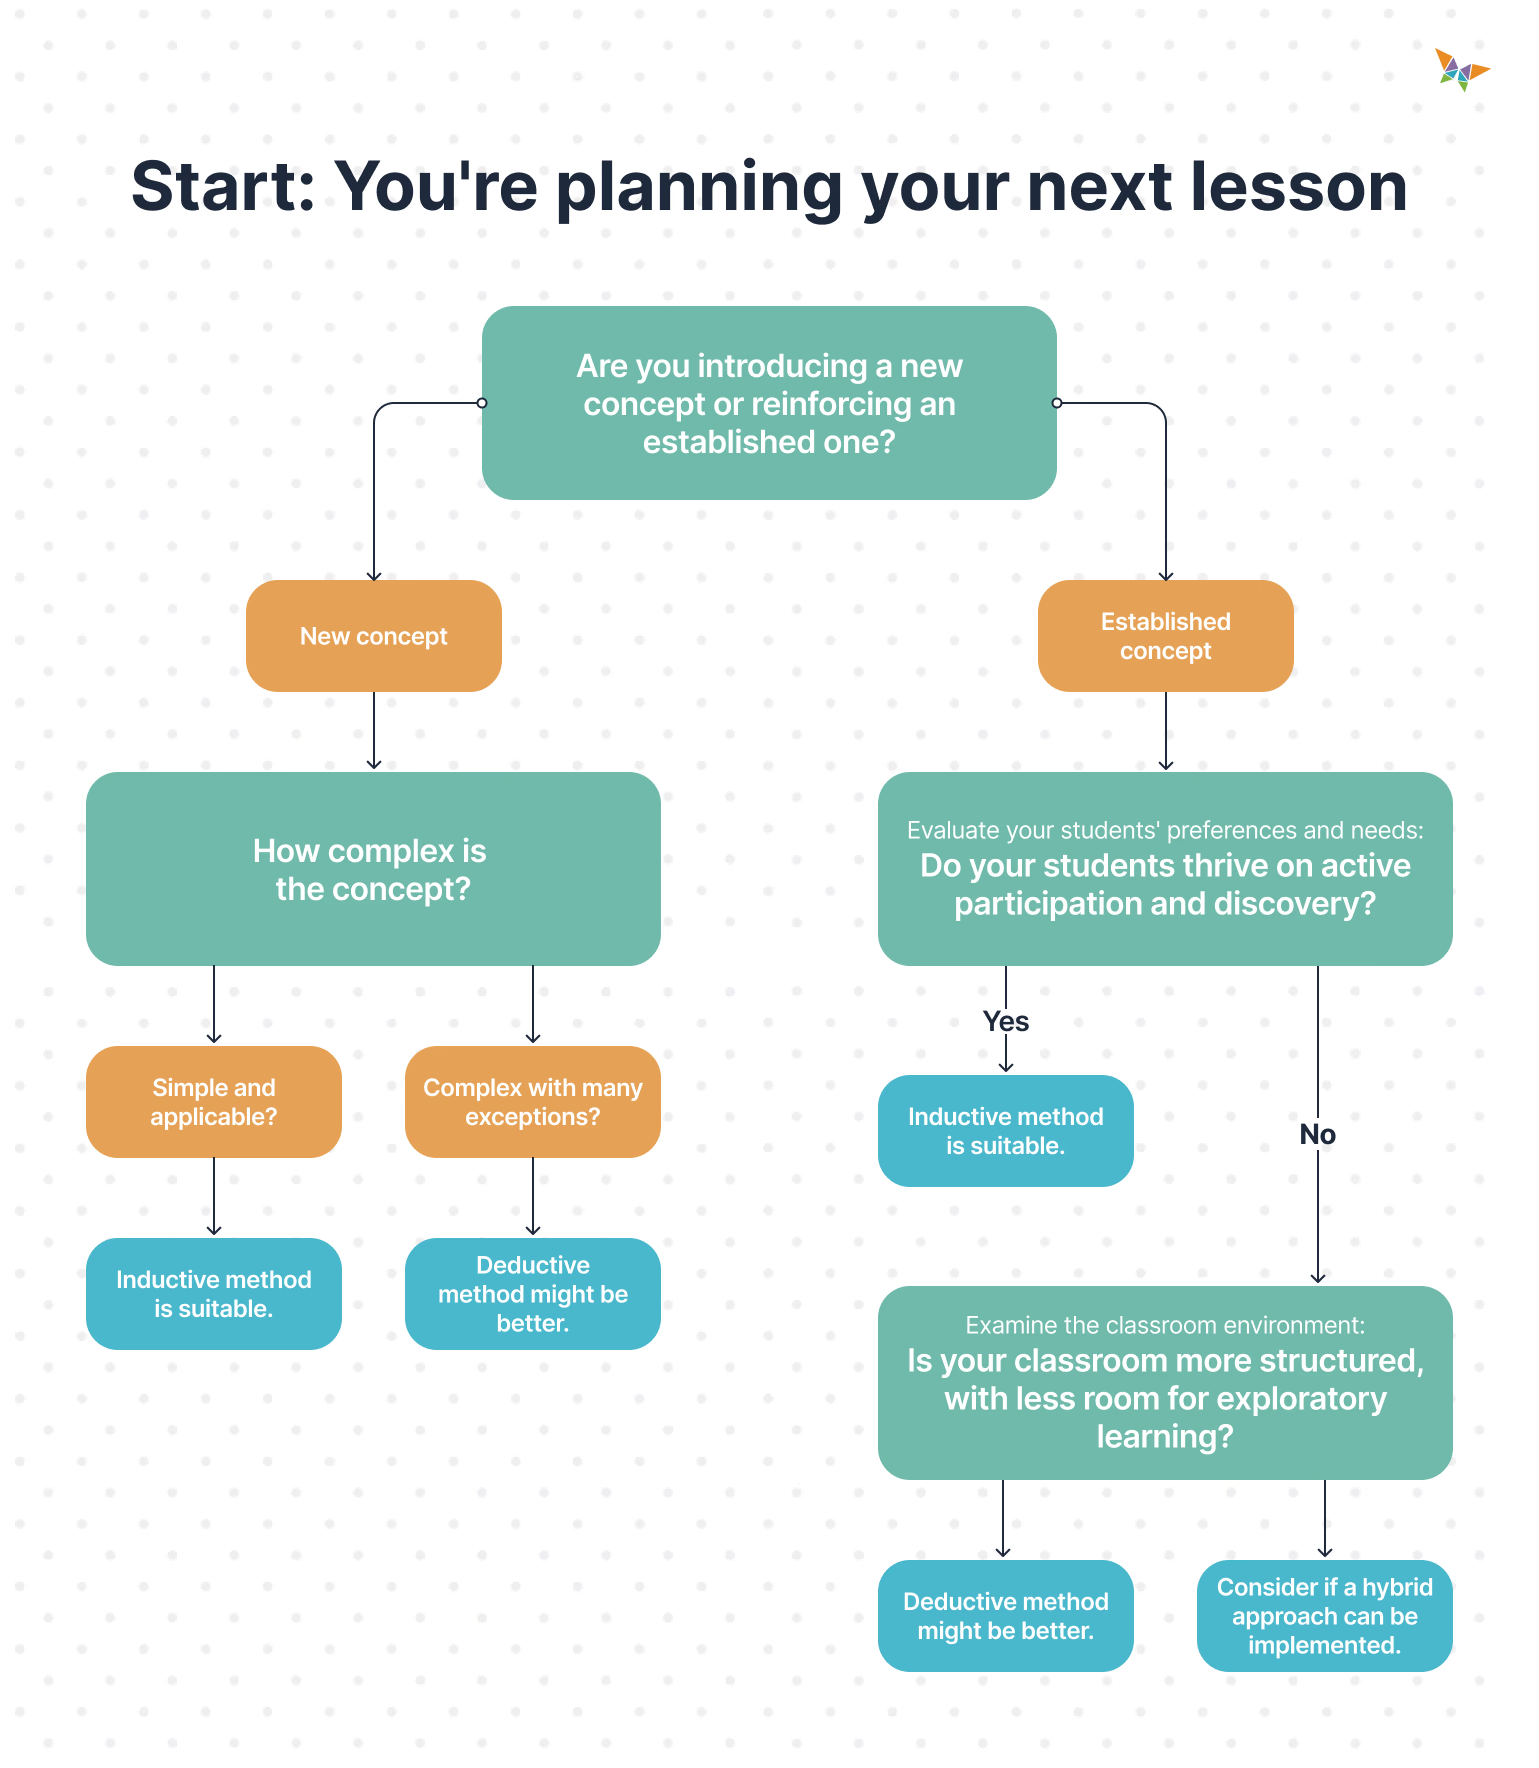
Now let’s compare the two teaching methods below:
Comparing Inductive Method of Teaching and Deductive Method of Teaching
When to Use Each Teaching Method
Inductive Method of Teaching is Best For:
- Active Participation: You're aiming for a classroom where every student is a mini investigator, diving into learning with both hands. Inductive teaching turns the classroom into a lab, where every lesson is an experiment waiting to happen.
- Simple, Engaging Concepts: When the topic is straightforward and ripe for discovery, inductive teaching is like unlocking a puzzle box. It makes the journey of discovering not just educational but downright fun.
- Group Work & Discussion: Ideal for subjects like literature or social studies, where discussing different perspectives really enriches the learning experience.
- Exploratory Subjects: Subjects like biology, where students can dive into the diversity of life, or geography are perfect for inductive teaching. These areas are rich with opportunities for discovery.
- Eager or Young Learners: Younger students, full of questions about everything, thrive with inductive teaching. It leverages their natural curiosity, especially in subjects like environmental science, where they can explore how the world works.
Deductive Teaching is Best For:
- Foundational Knowledge: This is essential for subjects that require a solid understanding from the start, like algebra or physics. It ensures everyone’s on the same page before proceeding.
- Complex Topics: When tackling subjects with many layers and exceptions, like advanced grammar or chemistry, this method helps ease complexities with clear rules.
- Focused Learning: This method is ideal when teaching calls for a spotlight on individual learning or one-on-one sessions. Deductive teaching ensures that the lesson's focus remains sharp, direct, and personalized.
- Precision and Clarity: In science experiments where accuracy is key, deductive teaching ensures students grasp the correct information right from the start.
- Time Constraints: When time is tight, like before a test, deductive teaching efficiently covers all necessary material. It's the express train of teaching methods, delivering students directly to the knowledge they need.
Choosing between the inductive and deductive methods is all about
matching your teaching style to
the lesson's needs, the subject's nature, and your students' learning styles.
In wrapping up, diving into the inductive method is an exciting journey worth embarking on in your classroom. It's a chance to see those lightbulb moments happen more often to foster a deeper connection between your students and their learning.
Give it a go, start small, and watch your classroom transform into a lively space of inquiry and discovery. Who knows, you might just find it as enlightening as they do.
Curious about bringing the inductive method, differentiated instruction, and other 21st-century teaching strategies into your classroom?
Connect with a mentor to explore how you can start professional development in these topics via various courses, certifications, and programs.


